Cruising down the highway when an unfamiliar red icon suddenly illuminates—accompanied by an urgent electronic chime—is enough to make any driver’s pulse spike. In those critical first few seconds, hesitation can be dangerous. Continuing to drive at highway speeds with an active overheating, oil pressure, or hydraulic braking fault can transform a manageable mechanical problem into a catastrophic roadside breakdown, a multi-vehicle collision, or permanent engine destruction costing thousands of dollars.
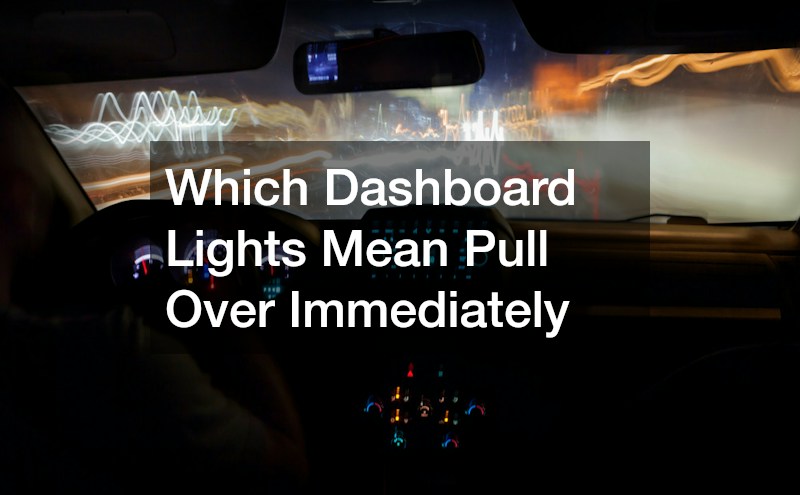
Modern vehicles rely on dozens of onboard sensors that continuously monitor fluid pressures, internal temperatures, electrical output, and active safety systems. To help drivers react appropriately under pressure, automakers organize dashboard warning indicators using a standardized color hierarchy modeled after everyday traffic signals. While green and blue icons simply confirm that systems like cruise control or high beams are active, yellow and amber symbols serve as early cautions that call for scheduled maintenance. Red icons and blinking indicators, however, represent active safety hazards or imminent mechanical failure that demand immediate action.
Knowing exactly which dashboard lights mean pull over immediately—and knowing the precise steps to execute once you spot them—protects both your personal safety and your vehicle’s long-term reliability. Below is a comprehensive breakdown of the warning symbols you should never ignore, how to respond safely in traffic, and what steps to take once you reach the shoulder.
Decoding the Dashboard Color Hierarchy and Warning Urgency
Distinguishing Red Immediate-Stop Alerts From Amber Service Warnings
Automakers design instrument clusters so drivers can assess urgency at a glance without taking their eyes off the road for more than a fraction of a second. Color is your primary visual cue. A solid yellow or amber warning light generally indicates that a component is operating outside normal parameters or requires diagnostic attention soon, though the vehicle remains safe to drive cautiously to a trusted shop for auto repair. Common examples include a steady Check Engine light caused by a loose gas cap, an oxygen sensor fault, or a tire pressure monitoring alert showing a slow leak.
Red warning lights operate under an entirely different rulebook. Whenever a red symbol lights up while your vehicle is in motion, it signals an active threat to occupant safety or severe, rapidly progressing mechanical damage. Red icons mean stop driving as soon as it is physically safe to steer out of traffic, activate your hazard lights, and assess the situation before moving the vehicle another foot.
Recognizing Why a Flashing Warning Light Changes the Urgency
Not every amber warning light gives you a grace period to finish your commute. When an indicator shifts from a steady glow to a rhythmic blink or flash, the vehicle’s onboard computer is signaling an acute malfunction happening in real time. A flashing Check Engine light, for example, indicates active engine misfires that are dumping raw, unburned fuel directly into your exhaust system, where extreme temperatures can destroy a catalytic converter within minutes or even spark an underbody fire.
Similarly, a blinking traction control or stability light during dry driving conditions suggests an active wheel-speed sensor glitch or sudden loss of grip. Whenever an indicator starts flashing, ease off the accelerator immediately, avoid hard braking, and arrange prompt local auto repairs before resuming normal highway travel.
Critical Engine and Cooling System Lights That Demand an Instant Stop
Responding Safely to the Engine Temperature Warning Light
The engine temperature warning light looks like a small thermometer submerged in wavy liquid lines. On some vehicles, the symbol illuminates in red; on others, an analog temperature gauge needle sweeps rapidly into the red H zone. Either signal means your engine coolant has exceeded safe operating temperatures, placing the aluminum cylinder head, head gasket, and internal pistons at immediate risk of warping or cracking.
If this light comes on while you are driving, take the following steps without delay:
- Turn off the air conditioning immediately to remove extra thermal load from the engine compartment and condenser fan.
- Turn the cabin heater and fan to maximum heat, directing the vents toward open windows. While uncomfortable inside the cabin, the heater core acts as a miniature secondary radiator that draws heat away from the engine block.
- Guide the vehicle smoothly onto the shoulder or nearest exit, shift into Park or Neutral, and turn the ignition completely off.
- Never open the radiator cap or coolant expansion tank while hot. Pressurized coolant can erupt in scalding steam, causing severe burns and blistering hood paint or surrounding auto body panels. Allow at least 30 to 45 minutes for the engine bay to cool completely before inspecting coolant levels or calling a tow truck.
Acting Immediately When the Oil Pressure Warning Light Illuminates
Resembling an old-fashioned genie-style oil can with a single droplet falling from the spout, the red oil pressure warning light is arguably the most urgent mechanical alert on your dashboard. Many drivers mistakenly assume this icon merely means their vehicle is due for a routine oil change or is slightly low on oil. In reality, it warns that oil pressure has plummeted below the threshold needed to lubricate moving engine components.
Without pressurized oil forming a protective microscopic film between crankshaft bearings, camshafts, and cylinder walls, metal grinds directly against metal at thousands of revolutions per minute. Driving even half a mile with an active oil pressure light can seize the engine solid. Pull over immediately, shut the engine off, and wait several minutes before checking the dipstick. Even if the oil level appears normal, the oil pump, pressure sending unit, or internal oil passages may have failed—a scenario requiring thorough diagnostics and specialty auto repairs rather than simply pouring in another quart of oil.
Stopping Before a Flashing Check Engine Light Destroys the Catalytic Converter
While a solid amber Check Engine icon allows you to schedule a diagnostic scan at your convenience, a blinking Check Engine light requires pulling over right away. Active cylinder misfires allow unburned fuel vapor to pass straight through the exhaust manifold into the catalytic converter. Because catalytic converters normally operate at temperatures exceeding 1,000 degrees Fahrenheit, raw fuel igniting inside the honeycomb substrate drives internal temperatures past 2,000 degrees—melting the ceramic core into a solid blockage or igniting surrounding heat shields.
If your Check Engine light starts blinking, release the gas pedal gently, avoid steep hills or heavy acceleration, and bring the vehicle to a safe stop off the roadway. Shut off the engine and have the vehicle towed so a technician can pinpoint whether failed ignition coils, fouled spark plugs, or fuel injector faults caused the misfire.
Braking, Steering, and Traction Warnings You Cannot Ignore
Pulling Over Safely When the Red Brake System Warning Light Appears
The red brake system warning light typically displays either the word “BRAKE” in capital letters or an exclamation mark inside a circle flanked by parentheses. First, glance down to verify that your parking brake is completely disengaged—a partially raised handbrake or depressed foot pedal frequently triggers this exact indicator. If the parking brake is fully released and the red light remains lit, your vehicle is signaling either dangerously low brake fluid or a hydraulic pressure loss in one half of your dual-circuit braking system.
Because hydraulic failure directly affects your ability to stop, respond calmly using controlled deceleration techniques:
- Test pedal resistance gently without slamming your foot down, as a failing master cylinder or ruptured brake line can send the pedal straight to the floor.
- Pump the brake pedal steadily if it feels spongy, which can sometimes build temporary residual hydraulic pressure in intact wheel circuits.
- Downshift into lower gears (or select Low / L on an automatic transmission) so engine compression helps slow the vehicle gradually before applying gentle parking brake pressure once speeds drop below 15 miles per hour.
- Do not attempt to drive home or to a shop if your brakes feel soft, sink to the floor, or pull sharply to one side.
Handling Simultaneous ABS and Traction Control Warning Lights
Modern vehicles pair Anti-Lock Braking Systems (ABS) with electronic stability and traction control using shared wheel-speed sensors at each corner. When an amber ABS light illuminates on its own, standard hydraulic braking usually remains functional, though your wheels can lock up during panic stops on wet or gravel surfaces. However, if both the ABS warning light and the traction control symbol (a car with squiggly skid lines) turn on simultaneously—especially alongside a red brake indicator—your vehicle has lost electronic braking balance.
In dry, light traffic, pull off at the nearest safe exit to inspect for visible brake fluid leaks near the inner tires. Avoid driving in rain, snow, or heavy highway traffic until a qualified local brake repair specialist tests the wheel-speed sensors, hydraulic control module, and fluid levels.
Managing Sudden Power Steering Failure on Busy Roads
The power steering warning light depicts a steering wheel next to an exclamation point, illuminating in yellow or red depending on the vehicle manufacturer. In vehicles equipped with electric power steering (EPS) or hydraulic pump systems, this alert signals a sudden loss of steering assistance. While mechanical linkage still connects your steering wheel to the front tires, turning the wheel—especially at low speeds, in parking lots, or around sharp exit ramps—suddenly requires substantial upper-body strength.
If the power steering warning light turns on mid-drive, keep both hands firmly at the nine-and-three positions on the wheel, avoid sudden lane changes, and allow the vehicle’s momentum to carry you smoothly onto a wide shoulder or straight stretch of frontage road. Once stopped, you can try restarting the engine once to see if a temporary electronic voltage glitch resets the electric steering module; if the warning persists, arrange for a flatbed tow.
Electrical, Airbag, and Visibility Alerts Affecting Crash Safety
Conserving Battery Power When the Charging System Light Turns On
Shaped like a rectangular battery with plus and minus terminals, the red charging system warning light often confuses drivers into thinking their battery simply needs a quick jump-start. In reality, this icon illuminates when the vehicle’s charging voltage drops below normal operating levels—most commonly because the alternator has stopped generating electricity or the serpentine drive belt has snapped.
Once the alternator stops charging, your vehicle runs entirely on whatever electrical reserve remains inside the battery. Depending on battery age and electrical load, you may have anywhere from five to twenty minutes before the ignition coils, fuel pump, and dashboard screens shut off completely mid-traffic. Immediately turn off the air conditioner, radio, heated seats, interior lights, and phone chargers, then steer toward the nearest safe exit or service station before the engine stalls unexpectedly. Remember that if a serpentine belt broke, your water pump and hydraulic power steering may also stop working simultaneously, making prompt stopping essential.
Clearing Camera and Sensor Obstructions Behind the Glass
Newer vehicles equipped with Advanced Driver Assistance Systems (ADAS) feature dedicated dashboard icons for forward collision warning, automatic emergency braking, and lane-keeping assist. When these symbols illuminate in amber or red alongside a message reading “Front Sensor Blocked” or “Collision Avoidance Unavailable,” the forward-facing optical camera mounted behind your rearview mirror has lost clear visibility.
Before assuming an expensive electronic module has failed, pull over safely and inspect the exterior glass directly in front of the camera housing. Heavy frost, road salt spray, mud, or bug residue frequently blinds optical sensors and can be wiped clean in seconds. However, if a stone chip, stress crack, or optical distortion across the windshield crosses the camera’s field of view, automatic braking systems can misjudge distances or shut down altogether, requiring professional auto glass repair and static or dynamic ADAS recalibration to restore factory safety performance.
Coordinating Towing and Post-Incident Inspections Safely
When contacting roadside assistance or your insurance provider’s dispatch line, share precise location details using highway mile markers, nearest exit numbers, or GPS coordinates from your phone. Let the dispatcher know which warning light triggered the stop, whether fluid is leaking beneath the engine bay, and whether the vehicle is equipped with all-wheel drive—since all-wheel-drive models require a flatbed tow truck rather than a two-wheel dolly to avoid transmission damage.
If a sudden steering loss, brake failure, or slick shoulder caused your vehicle to scrape a guardrail, strike debris, or sustain minor bumper damage while pulling over, document the scene with clear photos before moving the car. Have a certified auto body shop or auto collision shop inspect underlying frame rails, bumper reinforcement bars, and sensor mounts alongside mechanical repairs so hidden structural damage never compromises future crash protection.
Dashboard warning lights are your vehicle’s clearest early-warning system, designed to protect you from dangerous roadside failures and preventable mechanical damage. Remembering one simple rule makes split-second decisions easy: red icons and blinking lights mean pull over safely right away, while steady amber alerts give you time to arrange prompt diagnostic service.
By pairing calm, methodical roadside habits with monthly under-the-hood checks, you can respond decisively whenever an unexpected symbol illuminates on your instrument cluster. Bookmark this guide or keep a quick reference checklist in your glovebox so you always know which warnings require an immediate stop—and feel free to share which dashboard alert has ever caught you off guard on the road.
About the Author